When you are working to the WordPress site and sometimes you need to create an Admin user directly from the Database by using the phpMyAdmin.
Please follow the following steps to create an Admin user directly from the database using PhpMyAdmin. Here, I am assuming you are login to your hosting cPanel.
What is .htaccess File and How to Edit or create it?
The .htaccess file is a powerful server configuration file that provides multiple commands for controlling and configuring the Apache Web Server. It is located in your site’s root folder. You need to connect to your website using an FTP client to edit it or you can directly edit from File Manger by using cPanel access. In most cases, it’ll be there on your server, but it doesn’t, don’t worry. You can open any HTML editor or notepad to create an HTACCESS file. You have to write the required rules and save the file name with “.htaccess” (without double quotes) and need to upload it to the root directory of your website.
Important Note:Before editing your .htaccess file, it is suggested to download a copy of the existing file to the safe place of your computer as a backup. You can use that file in case anything goes wrong and the site not working as desired. So, in this case, you can easily revert back the file and keep your site working as it was.
Google reCaptcha is a free service from Google that helps protect websites from spam and abuse. Google has launched reCAPTCHA v3 to prevent spam bots without any user interaction. It returns us spam scores that can be used to take various actions in your web app.
What do I need to add the Google reCAPTCHA v3?
You only need a Google account to register your site to get API to use in your web application. So simple.
Meta tags are part of the HTML tags that help search engines and visitors to describe your page content. They are added between the <head> section of the HTML page but they are not visible to the front of the site for the visitors. These Meta tags are only visible at code part of the website and can be view in page code. If you want to check and see the details of Meta tags, you have to check the “Source code” of the page. Just do right click on the opened website (any white or blank space) and choose the option “View Page Source” or you can use the short cut key Ctrl + U of your browser.
So, we can say that Meta tags are the key part of the webpage for all search engines that is available to the HTML code of the webpage and tell the search engines that what the page is about.
Do Meta Tags only important for SEO?
Well, I can say, no. You don’t need to rely only on Meta Tags. If you wish that your webpage rank good on Google, you have to highly work on good-quality of page contents. If you get success to connect your users with your content that boosts your ranking automatically. But if you have an only good setup of Meta tags but your content not able to attract or failed to engage your customer, that won’t work at all.
Which Meta Tags I have to use on my website?
There are number of Meta Tags that can be used on your website. Here I am going to share some of Meta Tags which will be good to have on your site.
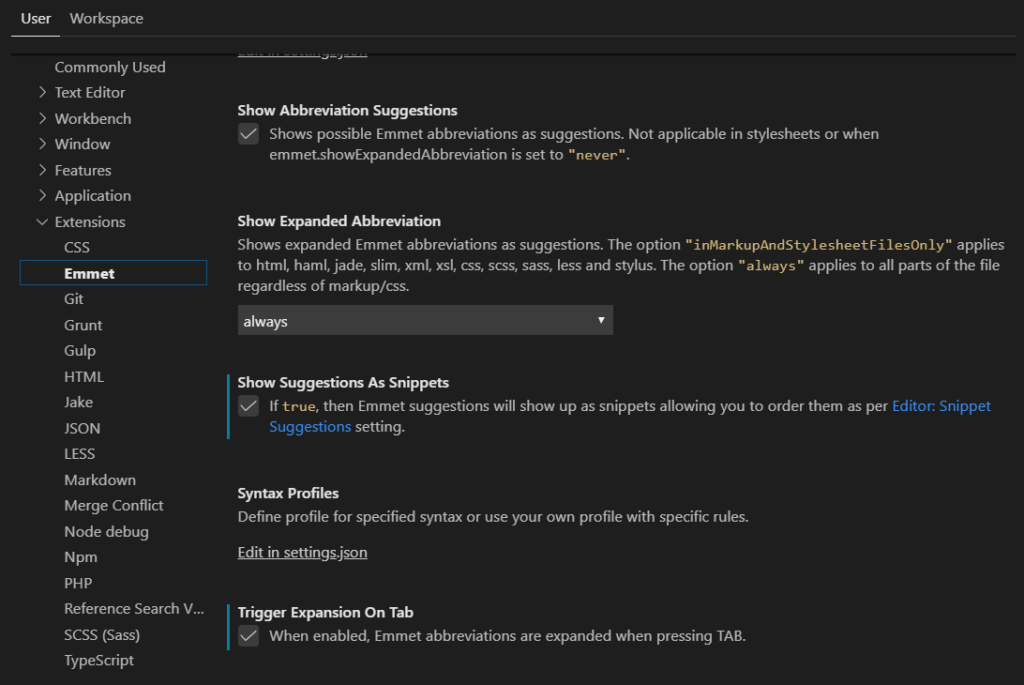
By using the Ctrl + , (comma), it’ll open the setting panel of your Visual Studio Code. Click on “Emmet” from the left side and keep the following options checked (true):
1
2
"emmet.triggerExpansionOnTab":true,
"emmet.showSuggestionsAsSnippets":true,
If you are using the latest version of Visual Code. Keep the checkmark for the followings: Emmet: Show Suggestions As Snippets Emmet: Trigger Expansion On Tab
If you have recently updated WordPress to a newer version or installed the fresh setup of WordPress, you may face the issue of the site not working and show the below message instead.
The file wp-config.php already exists. If you need to reset any of the configuration items in this file, please delete it first. You may try installing now.
Follow the below suggestions if it helps you. Personally, the first one is working fine for me.
Option 1:
Open Google Chrome and try to display the website first on the incognito tab. If it works correctly, do clear the browser cache.
Once the page refresh has been completed, the website will appear. You can use the following shortcuts to clear the browser cache. Windows: Ctrl + F5 Mac: CMD + Shift + R
Option 2:
The problem was there because of the following line in your wp-config.php. file. Please remove it and save your file. Note: Please take the backup of your file before do any recommended changes to your files.
If your web application store the current date and time to your database when user fill the data or submit any form, you have to set the timezone to save date and time according to your timezone.
You can set the default timezone in following two ways in php.
1) Change to the php.ini file by the changing the default timezone If you are not aware about to update the php.ini file, please follow the following instructions.
Open your php.ini file with the File Manager in cPanel
Locate and then open your php.ini file for editing.
Add the following line of code to top of your php.ini file
1
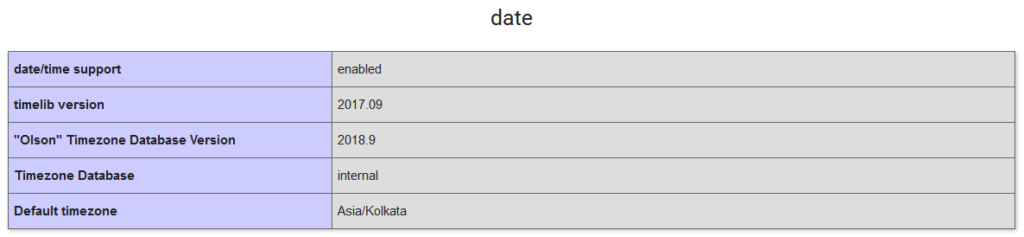
date.timezone=Asia/Kolkata
Once you update the php.ini file, please check your phpinfo.php page to verify the change took place. It should looks like below image
If you are at Ahmedabad – the city of Heritage and want to spend some quality time for short duration picnic. Here is the list of best places near Ahmedabad for one day picnic.
In Magento 2 you can remove the Related Items and Cross Sell items from backend manually. But what is the best way when your have large number of products and want to delete related items or cross sell items for all at once?