
Is your WordPress website feeling cluttered with unused themes? Keeping your site lean and efficient is essential for optimal performance and user experience. In this blog article, we’ll walk you through the process of removing unwanted themes from your WordPress server in just three easy steps. Say goodbye to the excess baggage and keep your website in top shape.
Option 1: From the WordPress Admin
Step 1: Access Your WordPress Dashboard
- Log in to your WordPress dashboard.
- Once logged in, click on “Appearance” in the left-hand menu.
- From the submenu, click on “Themes.”
Step 2: Look for the theme you want to remove
2.1. Locate ‘Appearance’ in the Menu: On the left-hand side of the dashboard, you’ll find a menu. Hover your cursor over the ‘Appearance’ option, and a submenu will appear.
2.2. Click on ‘Themes’: From the submenu, click on ‘Themes.’ This will take you to the page where all your installed themes are displayed.
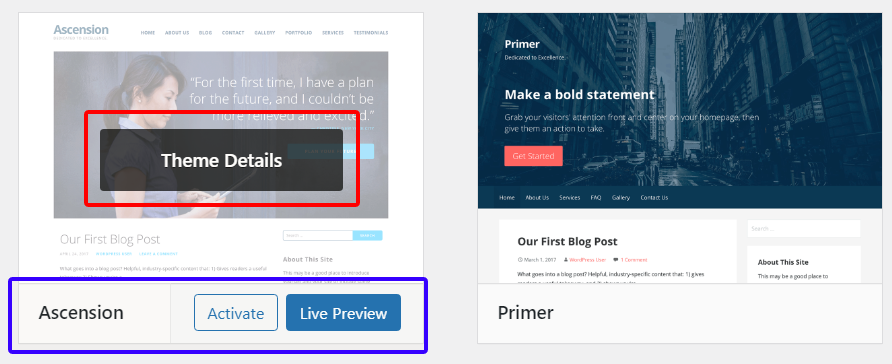
2.3. Identify the Unwanted Theme: On the ‘Themes’ page, you will see a list of all your installed themes. Find the theme you want to remove. It should be labeled as “Active” or “Inactive.” Hover your mouse over the unnecessary theme. You should see the “Theme Details” option. Click on it.
Step 3: Delete the Theme
Now that you’ve located the theme you want to remove, it’s time to delete it from your WordPress server. Follow these steps:
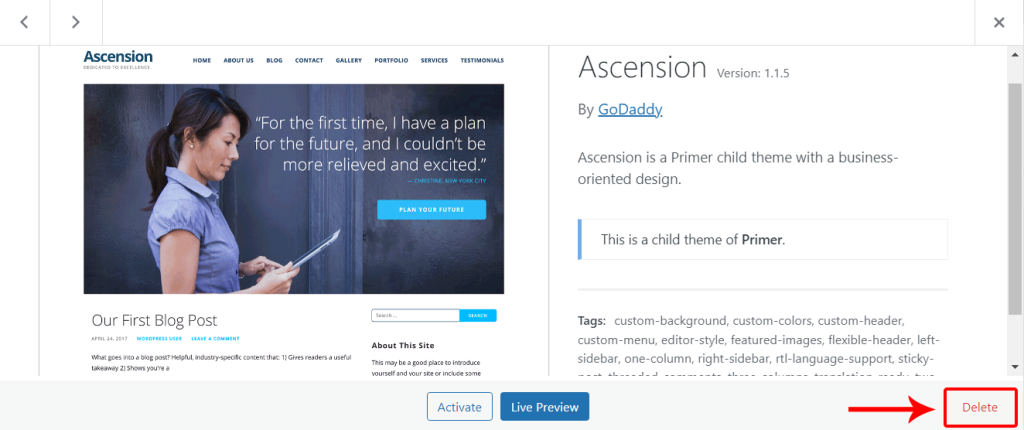
- In the Theme Details window, review the theme information to ensure you’re deleting the correct theme.
- If it’s the right theme, click the “Delete” button at the bottom-right corner of the Theme Details window.
- A confirmation dialog will appear, asking if you’re sure you want to delete the theme. Confirm the deletion.
Once you confirm, WordPress will remove the theme from your server. You will see a notification confirming the successful deletion.
Option 2: From the server by using FTP
Step 1: Access Your Server via FTP
- Download and install an FTP client like FileZilla if you don’t already have one.
- Open your FTP client and connect to your web server using your FTP login credentials.
Step 2: Navigate to the themes directory
- Navigate to the root directory of your WordPress installation. Typically, this is the “public_html” or “www” directory.
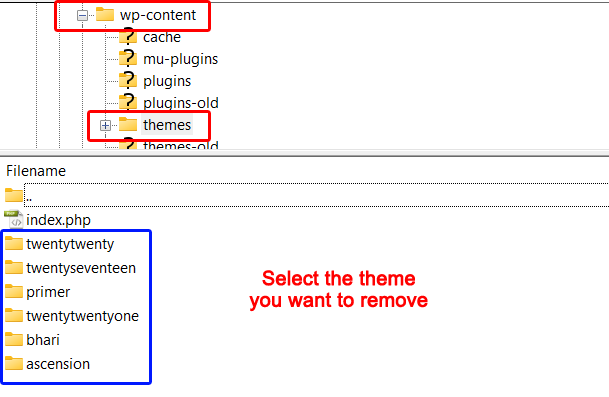
- Inside the WordPress directory, find the “wp-content” folder and open it.
- Inside “wp-content,” locate and open the “themes” folder.
Step 3: Delete the unnecessary theme folder
- In the “themes” folder, you will see folders named after each installed theme.
- Find the folder of the unnecessary theme you want to delete.
- Right-click on that folder and choose the “Delete” option to remove it from your server.
By keeping your website clutter-free, you can improve its performance and provide a better user experience. Regularly reviewing and removing unnecessary themes and plugins is a best practice in WordPress site maintenance. Keep your website efficient and enjoy the benefits of a streamlined online presence.